Coolant Heater (recirculating type)
Do you want some insurance that your truck will start during the colder, winter months? Are you hesitant like I was to have faith in the "intake heater" that comes with the truck? Have you heard the horror stories about shooting ether into your truck and things going terribly wrong? Well then you next logical option would be a coolant heater. There are two main types you can install; a circulating heater, or a block heater. This is a write up of installing the CIRCULATING HEATER. The heater I installed was a Katz part #13150 1500 watt heater.
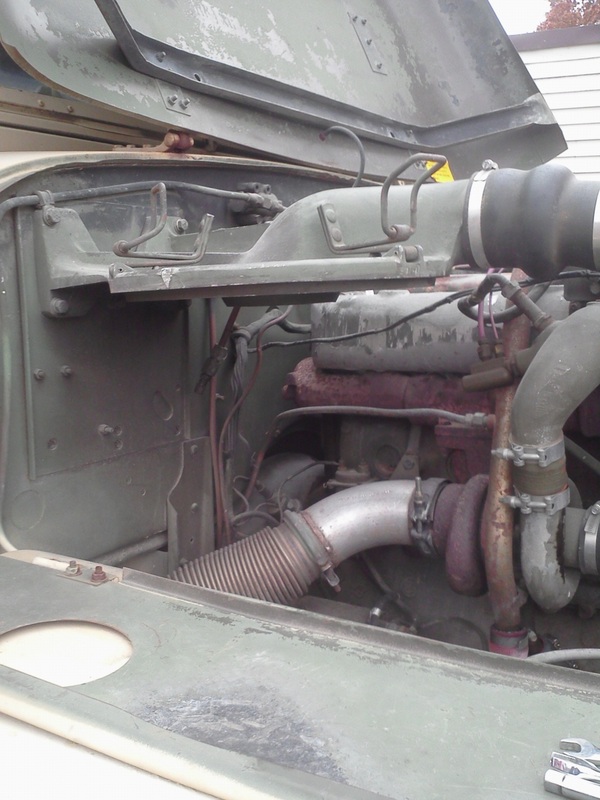
Once you have your vehicle securely parked, and the hood open, you will have to remove your air intake "mushroom" or snorkel. Open up the passenger side side panel. For ease of installation, you'll have to remove your air filter canister. Just pop the three clamps on top, and catch!
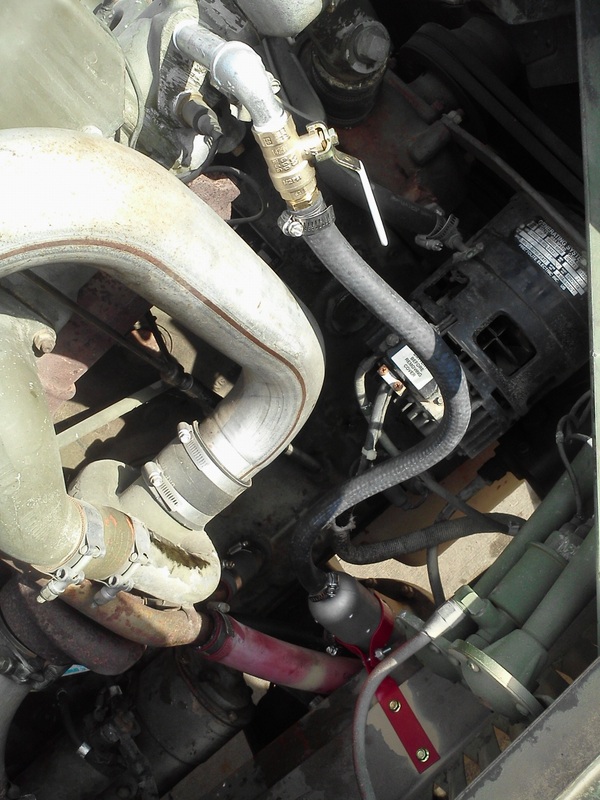
Now that the air filter can is out of the way, you need to locate your starter solenoid. It is the component pictured above. In the air cleaner picture, you can see the solenoid peeking up from behind the exhaust pipe. See it there? *NOTE* before messing with your solenoid, you should unhook your batteries to avoid any sort of electrical shock or short. Locate the two bolts that bolt the solenoid to the engine block. Remove these. These trucks are different in some funny little ways from truck to truck. On mine, behind the solenoid bracket, there were two "star" washers squished in there between the bracket and block. Watch for these to fall out when you remove the bolts.
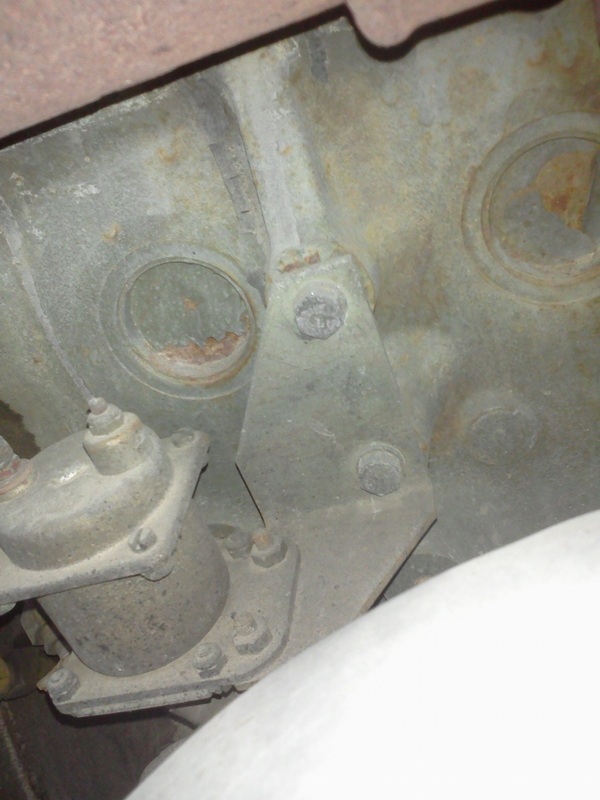
Now that the solenoid is out of the way, you will see a plug in your engine block. Until now, it would have been hiding behind the starter solenoid. When you remove that plug, all of your coolant is going to come gushing out of your engine/radiator. It's a 22 quart system, so you might want something to catch it all. If you haven't already, I would get a LARGE bucket and drain what I could out of the radiator, and the petcock at the back of the block near where you're working.
The plug in the block that you are going to remove is a 3/8 NPT plug. This will serve as the "IN" for the circulating heater. To remove this plug, I used some heat, then I used a female torx socket with my impact. Don't just jump on it and honk away at it. I just tapped on the impact trigger a couple of times and worked it out. In my truck's case, that plug may have been in there for 43 years. Take it easy!
Now that the plug is out of the block, you are going to need some hardware. Pipe fittings. I originally came out of the block with a 90 degree elbow. I was then going to use a 2 inch straight pipe to get clear of the starter solenoid, and then install an on/off ball valve. The two inch straight pipe wouldn't clear the natural slope of the block. To cure this, I ended up getting a second 90 degree elbow which gave me limitless angles to work with. Once I knew I was clear of the starter solenoid, I installed my valve, with a 5/8 hose barb on the end. From here, a 5/8 hose will go to the "IN" side of the heater.
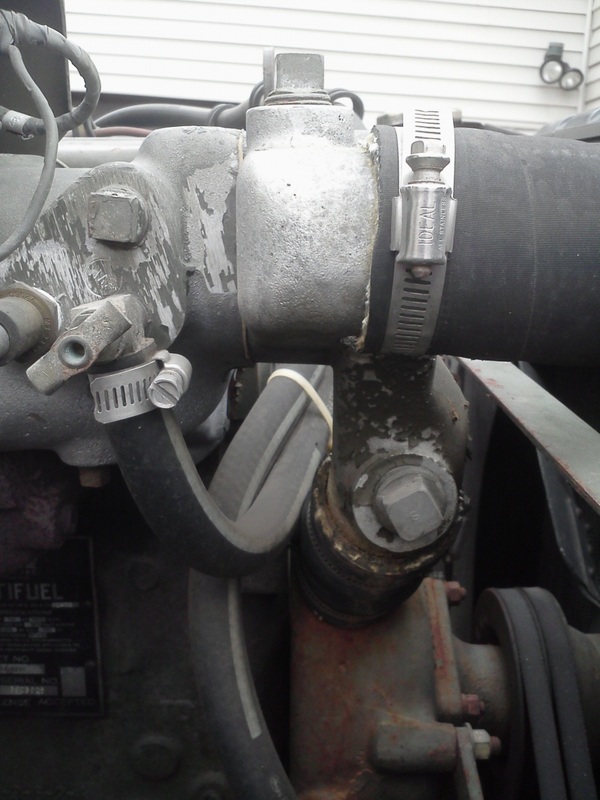
Now to the "OUT" side of the heater. You have a couple of options here, as you can see in the picture above. On the upper left side of the picture, you see a flat spot with 3 different ports. One is for coolant temp, one is for my heater hose with a bleeder petcock installed, and another is just plugged. The plugged one in this group is what I ended up using, but you don't have to on your truck. *NOTE* your truck may not look exactly like mine does. Not all trucks have a heater, so there would be two plugged holes. Etc, etc. In that group of three, you can utilize either of the holes.
Now, if you'll notice the HUGE hose clamp on the right half of the picture, and look just below that, you'll see a large plug. You can use this one also. If I remember correctly, this is a 1" NPT plug. I have seen guys that have used this one, and I imagine it would be just fine. The REASON I chose the location I did, is because all of my coolant will be circulated through the block. All on the same side of the thermostat. I have heard stories of the heaters failing prematurely due to having the thermostat restricting flow. I cannot vouch if this is true or myth personally.
To remove the plug I used, it was the same process as the block plug. Apply some heat, use the female torx socket, and put the impact on it. Don't just honk on it, but give it some taps of the trigger and walk it out nice and easy.
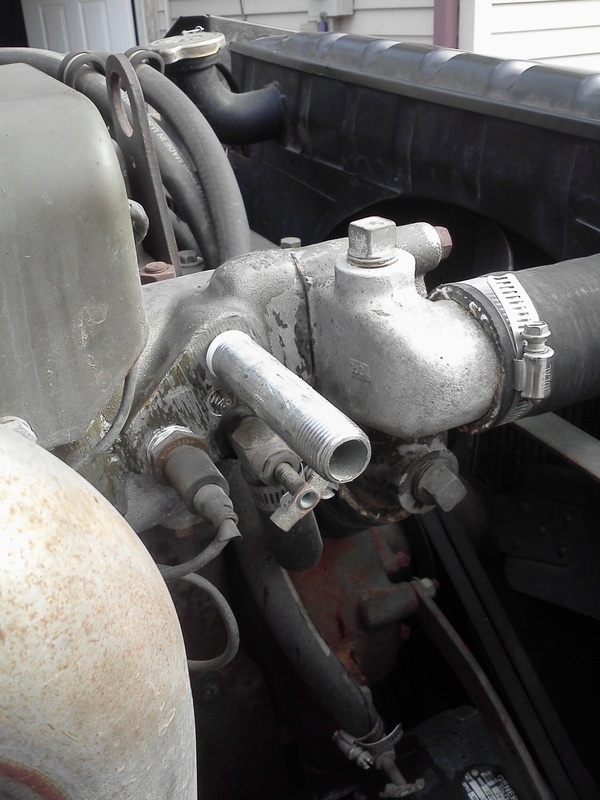
With the plug out, I first installed a 4" straight pipe to help me clear my heater hose petcock. In theory, I could have just flip flopped the two and moved the petcock up top, and the coolant heater down below, but I chose not to. I figure if the petcock is in there, and not leaking, we're just gonna leave that little guy be. So, in order to keep the petcock functional, I used the pipe to clear it.
On the end of the pipe, I then used a 90 degree elbow. Off the elbow I installed another on/off ball valve with a 5/8 hose barb. From there, a 5/8 hose will go down to the heater's "OUT" side.
On the end of the pipe, I then used a 90 degree elbow. Off the elbow I installed another on/off ball valve with a 5/8 hose barb. From there, a 5/8 hose will go down to the heater's "OUT" side.
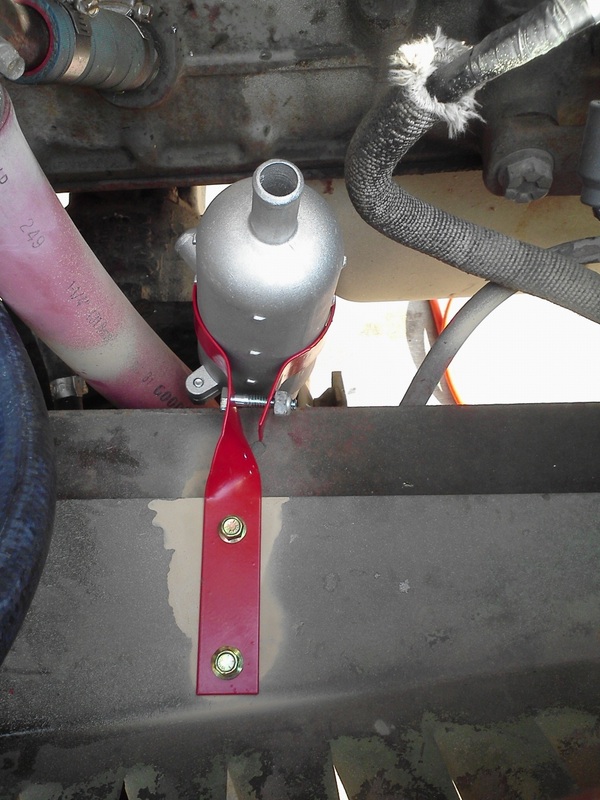
I had to find a place to mount the actual heater unit. The first thing I noticed, is the way the bracket came, wasn't going to work for any of my possible mounting locations. So, using a pliers and a vice, I "modified" the bracket so it was usable for my particular application.
I chose the inner fender as my mounting location. It was easier to drill into, I had access to the bottom side to put lock nuts onto, and it would hold the heater just inside the frame rail which should be a pretty safe location. I don't see a whole lot coming through that frame rail. *NOTE* the heater unit is aluminum so be careful as to not let any edges rub against it. These trucks vibrate a lot. This many vibrating steel edges will eat aluminum for breakfast.
For hardware, I just got a couple of grade 8 bolts, and a couple of nylon lock nuts for the bottom side. After I drilled my holes I shot some paint down there to help deter rust from attacking that spot. My truck is tan, and the engine bay will be as well one day, so that's why I just blasted some tan down there.
Make sure all of your clamps are tight. Make sure your starter solenoid is bolted back to the block and clears your elbows coming out of the hole in the block. I used thread tape on everything I installed to help assure that I don't have any leaks. That's just personal preference. Some folks don't believe in it. This one does.
Top off your coolant once you are sure your petcocks are closed and your clamps are tight. Once you've filled the radiator, I would suggest starting the truck and letting it run until the thermostat opens up. Give the truck a chance to "burp" out any air you may have introduced into the system. Once you've done this, and your coolant level is satisfactory, you're good to go!
Katz recommends to never run your heater while the truck is running. They also recommend that you mount your heater at the lowest point possible. In this write up I installed on/off valves. I did this for one main reason...and I quote: "It is like a condom....it's better to have it and not need it, than to need it and not have it." If the heater fails and needs replacing, I can do so without losing much coolant. Or, during the summer months, I can close off the new addition and keep the water from circulating through those extra lines = less chance of a leak developing.
